Slow Cooker Tamale Pie

 
I adore tamales.  But, the task of making them is about as much fun for me as getting a root canal.  They are time-consuming and messy and labor-intensive and tedious.  (Yes, I just threw a major run-on sentence at ya!)

So, when fate brought me together with making tamale pie in my slow cooker, I was super ecstatic.  I started the day planning to make a Mexican lasagna in the slow cooker - layers of seasoned beef, black beans, corn and cheese all tucked between flour tortillas.  But, when I went to grab the package of flour tortillas, I remembered that I had just used all but three of them whipping up some quick quesadillas for the kids before the school football game the other night.  So, I turned to the internet and some of my favorite recipe blogs for inspiration.  Thus, PLAN B was born. 

I keep masa harina (a finely-ground corn flour) on hand to thicken chili.  It is what is used to make up the "dough" portion of traditional tamales.  I kept with the beef, black beans and corn mixture that I initially had planned for the lasagna, but turned it all into a "tamale pie" that cooks wonderfully in the slow cooker.

One could easily change up the recipe to suit their tastes.  If you like things spicy, throw in some hot peppers.  You could substitute shredded chicken or pork for the beef.  Salsa could probably be used in place of the enchilada sauce.  And, store-bought taco seasoning may be a quick substitute in place of the spices called for in the recipe.

Yields 6 servings.

Back-to-School Recipes

 
I thought I'd gather up a collection of some kid-friendly recipes and ideas as many of us embark upon a new school year this time of year.  Some of these are breakfast ideas while some are more after school snack-centered.  You'll find ideas for creative ways to pack lunches for your kiddos and a few ideas for quick, fun dinners that will be sure to please picky palettes.  Some of these work great, too, if you're assigned to bring snacks for the classroom - the Broken Glass Jello is perfect to make using your school colors or holiday colors.

The links below correspond to the numbered photos above for easier reference.

(Not-So-Traditional) Cobb Salad


Although a Cobb salad can truly be made with whatever tickles your fancy (I really don't believe in too many rules regarding food), there are several key ingredients that are usually found in traditional Cobb salad.  Avocado and Roquefort cheese are two of those items.  I usually omit them since a couple of my kiddos don't care for either of those ingredients. 


My main purpose for writing this post was not to necessarily provide you with a recipe or exact ingredient list for Cobb salad that must be followed verbatim, but rather I was looking to inspire you to get creative when presenting a salad - whether it be simply for your family table on a weeknight or to wow special guests at a party.  Arranging your salad this way and utilizing whatever fresh, healthful ingredients are available in your area (or garden) can really elevate the sometimes-mundane tossed salad from drab to fab!

More simply put ... I want you to BE INSPIRED about salad ... and know that it's okay to serve this as your complete lunch or dinner once in a while.  We get so caught up in the whole meat-and-potatoes thing.  At our house, we actually enjoy "loaded" salads as a full meal - especially in the warm summer months - often along with a little crusty bread.  With lots of protein, veggies and dairy included in this salad, it really can be a satisfying and complete meal.

From my experience and research, a Cobb salad is usually dressed with some sort of red wine vinaigrette or a French dressing.  Serve it up with whatever dressing you like (store-bought or homemade).  (I've provided the traditional red wine dressing recipe at the bottom of this post should you care to follow it.)

Serves 4.

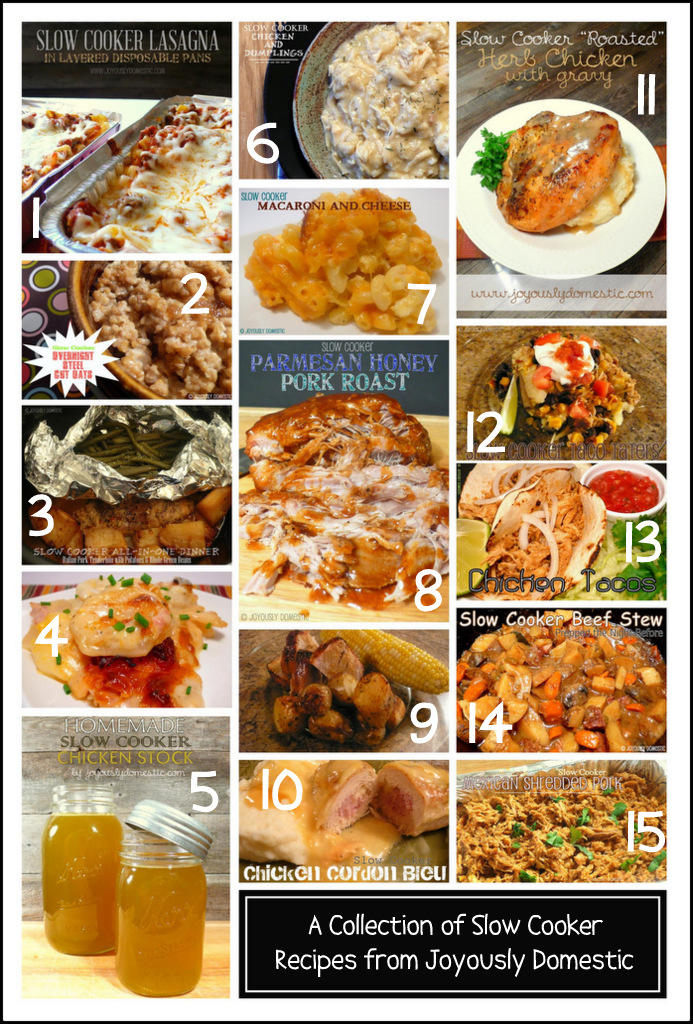
A Collection of Slow Cooker Recipes from Joyously Domestic


With the arrival of a new school year upon us, I thought I'd round up some of Joyously Domestic's slow cooker recipes.  Utilizing your slow cooker can be super helpful during those busy days when it's sometimes difficult to find time to get a home-cooked meal on the table at the end of the day.  I use my slow cooker a ton during the summer, too, just so that I can keep the oven off and still have a wholesome meal ready come dinnertime. 

The recipe links below are correlated to the numbers shown in the photos above - for easier reference.

Smoked Salmon Spread

My eleven-year old son, Zayne, has an adventurous palette and loves to try new foods. As a huge fan of all fish - especially salmon - he begged at the grocery store this week to buy a small package of smoked salmon as we passed the fish counter. When I told him that we had simply ran in to pick up a couple of items, he offered up purchasing the salmon with his own money that he had brought along.  Since he is usually pretty careful with his spending, I knew he meant business and must have had a strong desire to bring home the fish. So, I obliged and allowed him to make the purchase. He was so anxious to get the salmon home and try it on some crackers with just a little spritz of lemon. To my surprise, he declared that he really didn't care for it due to the smoky flavor. I, on the other hand, adore smoked salmon and jumped at the opportunity to reimburse him for the fish. Doing so meant that I could make one of my favorite dips!
 

This is a Martha Stewart-inspired recipe that I've adapted to my liking.  If you're wondering where to find smoked salmon or about the cost, I believe most grocery stores carry it these days in their refrigerated fish section.  A four-ounce portion (the amount needed for this recipe) runs around $5 dollars in the supermarkets here in Michigan.

This is a great dip/spread for parties or to nibble on while catching up on some DVR recordings late one night while the rest of the family is in bed (although I wouldn't know anything about that). 

No-Bake Chocolate Eclair Cake

My fourteen-year old, Allanah, gave this cake "two thumbs up" and announced that it's as good as Oreo Dirt Dessert. That, my friends, is HUGE. Oreo Dirt Dessert is her all-time favorite and is requested at EVERY one of her birthday parties in place of a traditional cake. So, rating this dessert on the same level is pretty significant. It may not be the prettiest or most-vibrant of desserts. It certainly isn't the most complicated or labor-intensive sweet treat to make. And, it, admittedly, is not the healthiest or from-scratchiest {that's a thing, right?} of desserts. But, it's damn tasty and kinda magical, to be honest.
 
 
Allanah and my six-year old, Ayvah, helped me assemble this cake. Putting it together is so stinkin' simple and quick. {Frankly, my girls did it almost completely on their own. So, yeah ... easy peasy.}
 
While making this dessert is a breeze, waiting overnight to devour it is the another story. {Patience, grasshopper.}
 
Yes, the key to this recipe is waiting, at least, twelve hours {I know!} before serving the cake. The crackers must soften up in order for the cake to resemble the texture of an éclair. {If you've got twenty-four hours, even better.}

NOTE:  This cake can be made using only graham crackers, but we throw in one layer of saltines, too, to give it a slightly salty kick. The saltiness is in no way overpowering or in-your-face. It's subtle and perfectly balanced. If you prefer, you can use only graham crackers for every cracker layer, however.

Serves 12.

Morning Glory Muffins


It's band camp week for our fourteen-year old.  Five straight days of "nine-to-five marching band instruction torture," as my daughter puts it.  Don't get me wrong - she adores being in band.  She has played trumpet in the middle school band for three years.  As she enters high school (OMG!) this year, she transitions to marching band.  So, mean old mom I made her participate in this week's band camp so that she'd be highly prepared for playing at the first football game next month.  Plus, I figured she'd enjoy reuniting with school friends and would maybe get off of this "I'm so bored, mom" kick!  You're bored?  Go to band camp.  Problem solved.  (For five days anyways.)

Her issue with going to camp is that she is HATING getting up early.  Heaven forbid I disturb her sleep-until-eleven summer break routine, right?  (Oh, the horror!)

Actually, I jest.  I joke.  She's a fabulous kid and I know she's been having fun at camp.  (Perhaps she'll live.)

Today was Day 2 of camp.  I made these muffins last night so she could take some along with her this week to munch on during her breaks.  Plus, these are my favorite muffins.  My mom made them for me all through high school to take along to my all-day volleyball tournaments and for my play rehearsals. 

(Ahhh ... I love when life comes full-circle, don't you?)


If you've never made Morning Glory Muffins, you're in for a real treat!  They are loaded with fabulous things like, carrots, apples, oats, coconut, nuts (if desired) and dried fruit.  When it's in season, I add in zucchini, too.  The muffins are beautifully flavored with cinnamon, ground ginger, brown sugar and a touch of molasses.  I substitute applesauce for part of the oil in my mom's recipe to help cut the fat little.  And, I often use whole wheat flour in place of half of the all-purpose flour.

These have just the right amount of sweetness and a dense, chewy texture.  They keep ya full until lunch.  They are great to take on the go for snacking and they travel well on road trips.

Yields 14 muffins.

Granola

My hubby and children were all tucked into bed Saturday evening when I decided to bake up a big batch of homemade granola.  Zayne, my eleven-year old, made his way out of bed to check out what the glorious aroma was coming from the kitchen.  The house smells amazing when homemade granola is baking.  So, at almost midnight, he and I shared a bit of fresh-out-of-the-oven goodness.  (Good times.)
 
What I love about making my own granola is that I can customize it to include whatever dried fruits and nuts I have on hand (or am in the mood for).  Best of all, it costs a fraction of what I'd pay if I bought a good-quality granola at the store.  If you have stores in your area that offer dried fruits and nuts in bulk bins, that's the route to go!  Grab what you want in small quantities ... it'll save you from buying big bags of nuts or dried fruit that may not get used before they go bad.  Also, it'll save on money ... a handful of nuts or dried fruit from the bulk section can be just a dollar or less.


Besides the oats, my granola is usually studded with coconut, nuts and whatever dried fruit we have in the pantry.  The mixture is seasoned with warm spices like, cinnamon and nutmeg.  And, my wet ingredients include honey, maple syrup, vanilla and orange juice.  I love the addition of the O.J.  It yields a slight hint of citrus to the granola and just a touch of extra sweetness.

This granola recipe produces the perfect combination of both crunchy and chewy textures in regards to the oats.  I hate when granola is so hard and crunchy that it almost breaks my teeth.  This granola rocks with the perfect amount of chewiness mixed in with some crunch.

It's just as easy to double or triple the recipe ... granola will keep in an airtight container for, at least, a couple of weeks.  It's divine over yogurt, with milk as a cereal (drizzled with a bit more honey) or just to snack on!

BLT Caesar Pasta Salad

The past two weeks have been quite relaxing and stress-free for us here at the Joyously Domestic household. We finished up softball and baseball season right at the beginning of the month, then we stayed pretty busy with cookouts and get-togethers over the Fourth of July holiday while my hubby had the week off of work. He's been back to the grindstone and out of state for work Mondays through Saturdays again. So, it has been just the three kiddos and I lounging around the house and relishing in the beautiful summer weather outdoors.


It's times like these that I am so grateful that my "job" is being a stay-at-home momma. Having late movie nights, trips to the berry patch, leisurely dips in the pool and no set schedule for right now has been joyful bliss. Oh, and we get to spend a lot of time in the kitchen together.

I love summers at home with my kids and wouldn't want it any other way.

They love helping me chop and mix in the kitchen. And, they are mega lovers of pasta. I've been making my "Veggie Overload" Pasta Salad on a weekly basis all summer (it is so darn yummy), but I've discovered another "winner" pasta salad right here, my friends.

This recipe is truly a combination of three of my favorite foods ... BLT sandwiches, Caesar salads and pasta salads.

You have a few options regarding assembling the salad. If you're making this more than a couple of hours before serving, you may choose to wait to add in the chopped/shredded lettuce until shortly before serving to guests. {This will ensure that it doesn't get too soggy or limp.} And, if you strongly prefer crisp bacon, you can have that ready and kept separate, as well. Just stir into the salad at the time of service. {Doing so will ensure that your bacon doesn't become too soft or rubbery.} So, just plan according to what you prefer.

Yields 8 servings.

Skillet Chicken Parmesan Over Pasta

This recipe is a simple variation of traditional Chicken Parmesan.  The chicken and sauce can be served with whatever pasta you prefer.  Once the pasta is cooked, everything comes together in one pan.  We're skipping the heavy breading and deep frying here, so you can kind of consider this a bit of a lighter version ...  although there is a bit of butter on the ingredient list and a good amount of cheese.  Cheese, glorious cheese.
 
 
This dish stretches two large chicken breasts into one meal that will serve around four people, so it's pretty economical, too.  And, if you wanted to make this even more healthful, you can skip the light coating of breadcrumbs altogether and simply just sauté the chicken breasts (seasoned with the salt, pepper and Italian herbs) in a little olive oil all.

This dish went over splendidly in the Joyously Domestic household.  It makes for a pretty easy and satisfying weeknight dinner option. The process is pretty straightforward.  Boil off the pasta.  Lightly coat the chicken with salt, pepper, herbs and breadcrumbs.  Sauté the chicken in a bit of olive oil, then remove it from the skillet.  Place the cooked pasta down in the skillet, nestle in the chicken, spoon on some good-quality marinara sauce, top with lots of cheese, allow everything to become bubbly in the oven and then grab a fork!

Yields 4 servings.